December 26, 2013

Pilot Decimo Fountain Pen: Capless Wonder

I usually begin a post with a catchy phrase like: "I recently acquired _____________, and it's awesome." I can't do that here because my Pilot Decimo fountain pen came into my possession more than six months ago. Unfortunately, it will be tough to write about "first impressions" because my memory sucks and I've been using the pen almost daily since I got it. On the plus side, I'll be able to reflect on six months of consistent use.

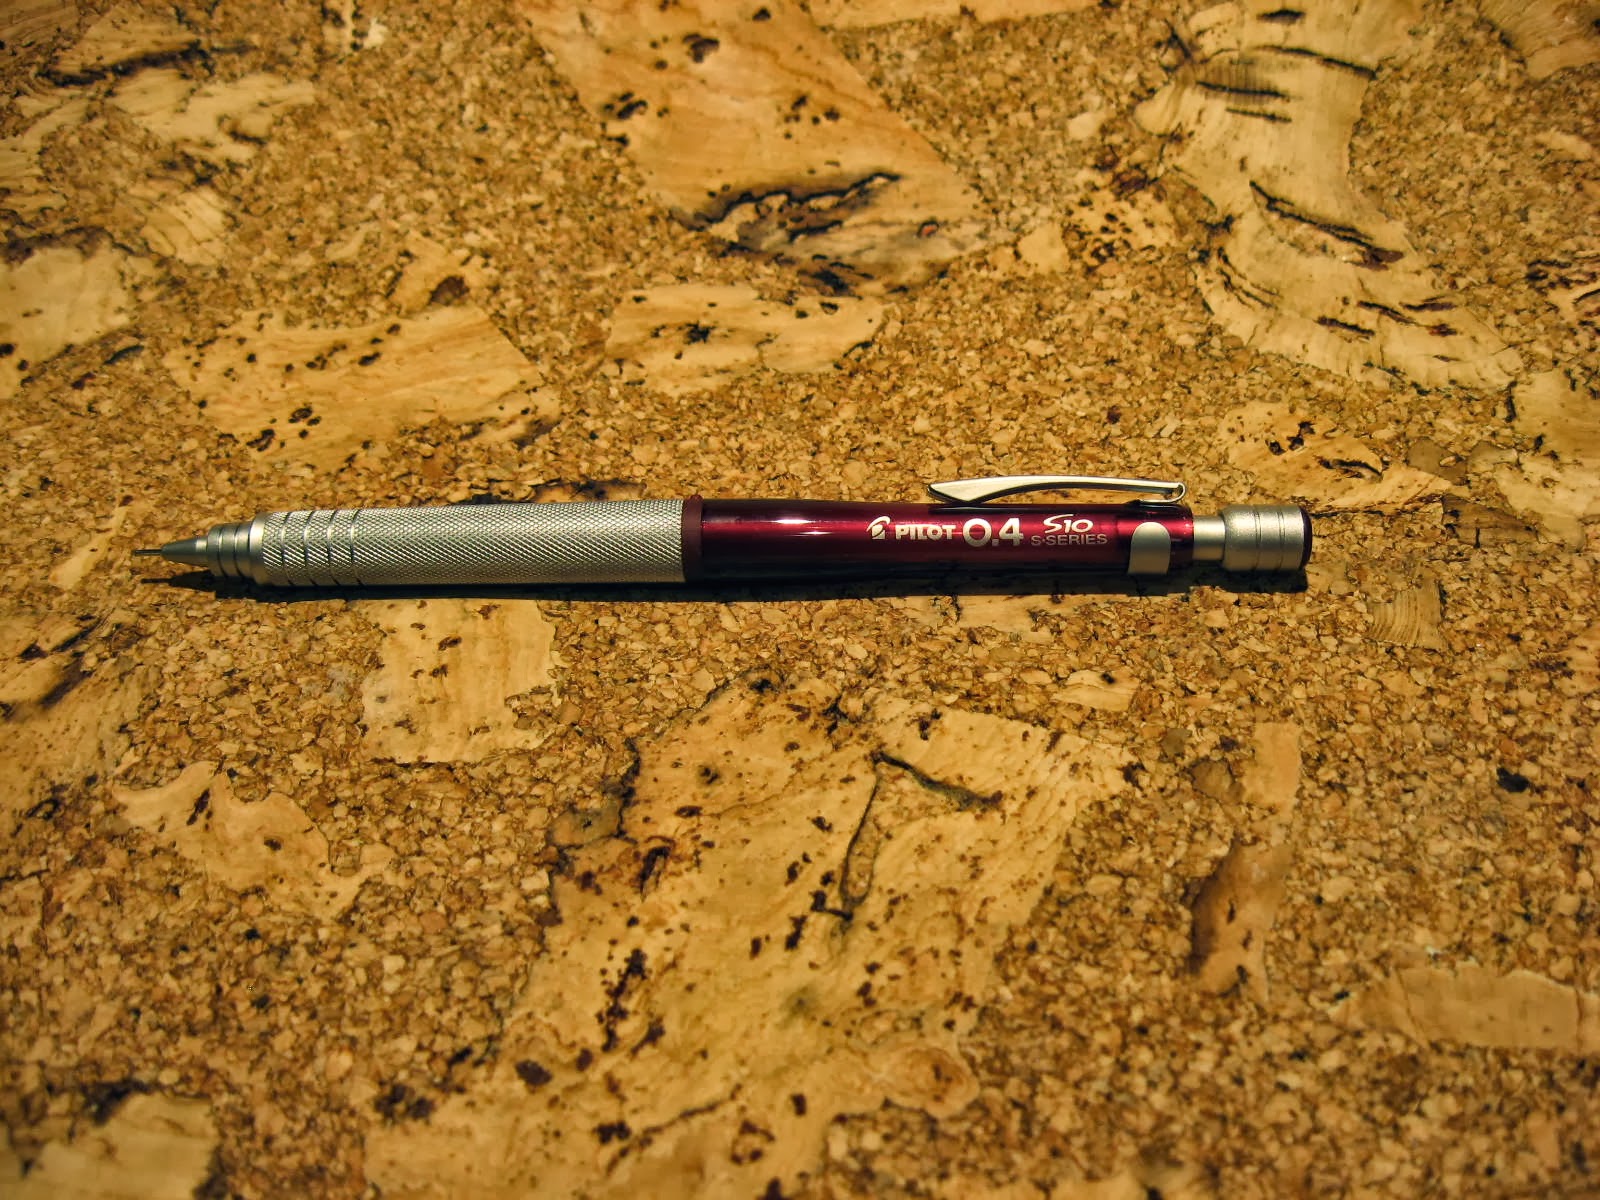
The Decimo is one of Pilot's capless fountain pens. For those wondering . . . "capless" = "retractable" in this context. The capless mechanism is identical to that used in the well-known Vanishing Point fountain pen by Pilot. I acquired a dark blue version with silver (rhodium) trim; ordered from an online vendor based in Japan. I've seen these offered on the Internet within the range of US$120 to US$260, and I can't explain the price variation. I suspect that the lower prices may reflect a product with a lower quality nib component, that the higher prices may reflect a limited edition version, or both.

I'm glad that I ordered the dark blue version. The blue is deep and slightly shimmery, without looking cheesy or tacky. The silver trim is brightly plated, and it matches the plating of the nib. If I'm being honest, I think a satin silver or nickel trim would look better with the blue body, but then the exterior trim wouldn't match the nib. The fit and finish of this pen is very good, and I have no complaints in that regard.

I chose the Decimo over its famous cousin (the Vanishing Point) because the Decimo is a little more compact in size and I thought it would be a better fit my child-like hand. I don't own a Vanishing Point and, therefore, can't do a hand-by-hand comparison, but my online research (which is always 100% accurate because everything found on the Internet is the truth) indicates that the Decimo is, in fact, less bulky and thinner in the grip area.

Speaking of the grip area, the pocket clip is attached to the nib end of the pen so that the nib doesn't leak during pocket carry (unless the carrier likes to walk on his/her hands, is a trapeze performer, or is an astronaut). Some users complain that the clip interferes with their fingers, but the clip doesn't bother me at all. In fact, I like how the clip also serves to align the pen in the hand such that the nib is properly oriented for writing.

The retractable nib mechanism is an engineering marvel. OK, it's not up to par with the Hoover Dam, but it's still pretty slick. The Decimo works just like a typical clicky style ballpoint pen: click once to extend the nib; click again to retract it. This is great for use at work, where I often jot down quick notes and annotate documents. In that typical workplace scenario, it's a hassle to frequently uncap and recap a traditional fountain pen to prevent it from drying out.

The following picture shows the business end of the Decimo with the nib retracted. The picture doesn't reveal the trap door thingy that covers and seals the nib inside the body of the pen. The door really works well . . . the nib has never dried out on me (although I haven't let the pen sit unused for more than a week).

In
A click of the button causes the nib unit to advance, which causes the door to open, which in turn allows the nib to extend into its locked position. Simple.

Out
After doing extensive research, I decided to get a fine nib. My choice was influenced by the fact that I do most of my office work on standard copy paper and cheap notepads, both of which exhibit a fair amount of feathering and ink spreading. I also read that there is a considerable increase in nib size when stepping from fine to medium nib units. In hindsight, I'm glad that I got a fine nib. It works great for my routine office work.

Speaking of the nib . . . the nib units of Pilot's capless pens (including the Decimo and the Vanishing Point) are interchangeable, and are offered by several vendors. I might obtain a medium nib unit if $70.00 magically appears in my wallet some day. The nib unit includes the nib, the feed, and a tube that accommodates Pilot ink cartridges (which only fit Pilot fountain pens) and certain Pilot ink converters (Pilot's CON-70 converter does not fit). The pen also comes with a metal sleeve for use with ink cartridges. The sleeve protects the cartridge and provides support for the actuation mechanism.

Nib Unit + Ink Cartridge Sleeve
I've used the Decimo with Pilot's CON-20 squeeze converter, Pilot's CON-50 piston converter, a Pilot ink cartridge, and a Pilot ink cartridge refilled with different ink. The converters work fine, but I found myself refilling them too often. Pilot's cartridges hold a little more ink, and it's easy to refill them with my own ink (using an ink syringe).

After more than six months of almost daily use, I can honestly say that I love this pen. The nib is rhodium plated 18 karat gold, and it has a little bit of give. I can't say whether or not it is "soft" per se, because I've never written with a truly soft nib. I do like the feel and smoothness of the nib, and the unusual shape/size of the nib has little to no impact on the writing experience. The performance of the nib is right up there with my other "good" fountain pens.

Moreover, the size and weight of the pen is nearly perfect for me, and the retracting mechanism works as expected and without any problems. I don't have any legitimate complaints about this pen, other than the high price. If it were less expensive, I'd already have another one for my home office.

Here are some writing samples that I created soon after I received the Decimo:

Sample 1
Sample 2
Sample 3
And here is a nice parting shot of the pen.


This will probably be the last post of 2013. Happy New Year!

December 16, 2013

Christmas Lights: Second Place = Loser!

I was the first one on my block to put up lights this season . . . they went up the weekend BEFORE Thanksgiving. I actually planned to merely lay out the new lights and do some pre-wiring, but the project gained momentum and I went ahead and set up everything. As I mentioned here, I wanted to step things up and try to catch up to my neighbor, who is the clear leader on the "Best Lights on the Block" list.

I admit that I was rather pleased with my lights after firing them up. The modern LED light strings and the sheer number of lights are quite impressive. In fact, I was the block leader for eight days. The next weekend, however, I was put to shame by my neighbor. I think he added a few items to his arsenal from 2012, and my light display is still deep in the minor leagues relative to his big league arrangement.

Oh well, this is only a friendly competition that we both hope will encourage other neighbors to light things up. I wasn't planning on adding anything else this year, although I had been considering how best to improve things for 2014. In fact, I actually went out and bought an extension ladder to measure the roof line and eaves for next year's light strings, and recorded all of the pertinent dimensions last weekend. While taking the measurements, I noticed that my neighbor was adding more stuff to his house. He obviously knows that I'm trying to catch up, and he's intentionally upping his game just to see me sweat! It's really tough to keep pace with the guy.

So, I'm writing this post because I terminated my delayed 2014 light deployment plan this morning. While drinking a tasty cup of Ethiopian coffee, I stumbled upon this website devoted to LED Christmas lights. The website isn't very polished, but it lists some items that I had been considering for next year, and the prices are decent. One thing led to another and my shopping cart was full before my coffee cup was empty.

Impulse Purchase
Today's acquisition will be used to adorn the upper roof line of the house, and to replace some of the old dim lights that I've been using. In my opinion, lights on the upper deck really separate the serious players from the run of the mill amateurs. It's time to join the ranks of the ridiculous. I'll still be in second place by a huge margin, but Rome wasn't built in a day.

I know that pictures would be nice, but I'm not about to take pictures of my neighbor's house and post them. Moreover, my point and shoot camera sucks and doesn't like to take pictures at night. I'll try to take some pictures of my lights after the aforementioned products arrive and get installed.

December 14, 2013

Quick Update: Too Much Going On!

I haven't set aside enough time to write more posts. I have a number of items teed up, but things are a little hectic with the holiday season and everything. I'm waist deep in a couple of "projects" that have kept me in the cycle of researching, wish-listing, over-analyzing, and rethinking. Once I get out of this rut, I'd like to blog about the projects. As a preview, I've been dealing with my 2013 Christmas lights and some audio/video gear. And some work getting done to the house. Let's not mention holiday shopping.

Stay tuned for details!

November 29, 2013

5.1 Channel Music Titles

I absolutely love listening to my favorite music, preferably by way of decent audio reproduction equipment. Unfortunately, due to finances, the lack of space, and self-imposed restraint, I haven't had a decent playback system for many years (I was an early adopter of home theater gear and DVD playback, but I got rid of my home theater rig a long time ago and haven't replaced it yet). That said, I have some decent portable music players, some great headphones, and a very nice computer-based 2.1 channel setup at the office. But nothing worth listening to at home . . . yet.

My Awesome Home Theater System
My place is undergoing a minor remodel to add a "bonus" room for everyone to enjoy. In this context, "everyone" includes me, so I've planned accordingly. At first, I wanted the room to accommodate a pool table, some old school pinball games, a dart board, a hi-fi rig, a shuffleboard table, a shooting range, a trampoline, and a poker table. The reasonable voice in the household scaled my plan back somewhat, leaving me with a small "hangout" and home theater room. Oh well, I'll take it.

My Awesome Media Room
So, I'm currently looking at various home theater equipment to outfit a room that doesn't even exist yet. Moreover, a good friend of mine (who happens to be a true audiophile and a big fan of quadraphonic music) recently gave me a demonstration of his awesome quad system, and I was instantly hooked. We listened to some Pink Floyd and King Crimson in high resolution 5.1 channel DVD formats, and the surround sound experience was something to behold. Suffice it to say, a new acquisition disorder set in that day, and I've been collecting and wish-listing various multi-channel audio titles since that day. This disorder is particularly troubling because I don't even have a compatible playback system yet. I do have a Blu-Ray disc player, but it's merely hooked up to my TV speakers. Unimpressive non-surround sound to say the least.

Here's the problem: it's not easy or fiscally painless to acquire 5.1 channel music titles. There are a number of reasons for a lack of new and used inventory. First and foremost, there is little demand for surround sound audio because most people listen to MP3 files on the go these days. Does anyone actually sit down and listen to music anymore? Second, rapidly evolving and competing surround sound and high resolution audio formats have made it difficult for content providers to sustain sales. For example, 5.1 channel music can be delivered on a standard DVD, on a DVD-Audio disc (which may be incompatible with some DVD players), on a SACD, on a Blu-Ray disc, etc. At present, Blu-Ray audio is the newest vehicle for delivery of high resolution multichannel audio. Unfortunately, this means that it's becoming increasingly difficult to score out-of-print titles that are only available in older "obsolete" formats.

What does one do about this? One gets addicted to hunting down multichannel audio discs. Thankfully, there are some old SACD titles that can be had on the cheap due to high inventory and little demand. There are a handful of newer Blu-Ray titles on the market, but they can be rather expensive if the disc that you seek is only available in a special anniversary deluxe collectors ridiculously priced edition.

Nothing To Hear Here
This post is not intended to be a "look at my collection" ego booster, and I know that my inventory is small compared to serious collectors. I'm not really collecting for the sake of ownership or investment; I'm simply trying to find my personal favorites before they go completely extinct so that I can enjoy them on my nonexistent home theater system in my nonexistent media room.

Speaking of ridiculously priced exclusive collectors editions, my stack of items includes the "Immersion" box set of Pink Floyd's "The Dark Side of the Moon", which includes a Blu-Ray disc that is chock full of audio goodness. The Blu-Ray disc includes a high resolution 5.1 audio version of the album - that version is currently ranked as the best surround sound title on the QuadraphonicQuad site. For this reason, I'll probably listen to Dark Side first. I regret that the picture does not include anything from Tool, Radiohead, Isis, Explosions in the Sky, or The Beastie Boys, but I'm pretty sure that 5.1 audio titles from those bands are not commercially available. No such luck.

Perhaps I'll post some comments about my listening experiences if and when I am able to actually play the discs. Until then, I'll continue in my attempt to acquire more titles (if anyone want's to unload their DVD-Audio version of Deadwing by Porcupine Tree, just let me know).

November 11, 2013

The Wide World Of Shaving Stuff

One thing that I like about my traditional wet shaving routine is that the shaving products (shave soap, shaving cream, aftershave splash) don't need to be replenished for a very long time and, when necessary to do so, they are relatively inexpensive to acquire. Moreover, double edge razor blades are ridiculously cheap in comparison to something like the Gillette Fusion cartridges, which cost around $3.00 apiece.

I had to restock some basic shaving supplies recently, and got what I believe are three "best in class" products. Interestingly, the products originate from all over the globe: England (Truefitt & Hill shaving cream); Japan (Feather razor blades); and Italy (Proraso aftershave splash).

The shaving cream is the "1805" version from Truefitt & Hill, named after the year the company was founded in London. Truefitt & Hill products are all top quality, and this shaving cream is very good - slick and thick lather, nice smell, rinses clean and easily.


Moving further down into Europe we come to Italy, where one can find Ferrari automobiles, leaning towers, and Proraso. This Italian brand makes a number of shaving products, including this awesome mentholated alcohol-laden splash. The scent isn't overpowering, which is one reason that I like it so much.


Traveling east into Asia, we arrive in Japan. Simply put, Feather double edge razor blades are the sharpest and bestest blades that you can find. They are a little pricey relative to other DE blades, but they are still much less expensive than modern multi-blade cartridges.


As of the date of this post, a pack of ten blades (shown above) can be had for about $4.50. I usually change blades once a week, so the cost per shave is minimal. If you are willing to buy in bulk, the cost per blade becomes even more economical.


So . . . there are twenty packs in that box, for a total of 200 super sharp blades. I'm all set for about four years now.

By the way, good shaving supplies are also produced in countries such as the United States, Portugal, Spain, Russia, Germany, Canada, Korea, etc. This stuff is available all over the world.

October 31, 2013

Drafting Pencils! Pentel P205, Pilot S10, and Staedtler 925-35

My FPAD (fountain pen acquisition disorder) has settled down somewhat, but I've been slowly collecting more mechanical drafting pencils to add to my quiver. I wanted to try some pencils that I've seen and read about (other than the Pentel Sharp Kerry and the Pentel Graph 1000 For Pro). I admit that I went a little overboard and, in a moment of geekness, ordered three pencils from a Japanese vendor: Pentel P205; Staedtler 925-35; and Pilot S10 (shown left to right in the following picture).

Three Of A Perfect Pair
I bought the P205 for nostalgic reasons, as this is the classic mechanical pencil that I used during high school, college, on the job, etc. It's a great design, and it works great, too. I got this pencil in the 0.5 mm size, and in a special colorway that looks like carbon fiber.

The Classic P205
I ordered the Staedtler primarily because Dave ranks it in his top ten. I had to see for myself. I opted for the navy blue version, also in the 0.5 mm size. The size is conspicuously marked on the end of the eraser cap, which is great unless you are a free spirit who likes "points up" in your pencil cup.

Staedtler 925-35
The fit and finish of the Staedtler 925-35 is really nice. The knurling at the business end is nearly perfect, and the chrome accents look great against the blue body. The pocket clip is sturdy, with a good amount of tension. The lead hardness indicator near the knurling is a nice touch (it has selections for 3H, 2H, H, F, HB, B, and 2B).

Staedtler 925-35
I got the Pilot S10 for its eye candy appeal, and because it also gets good reviews. Pilot's S10 line is color-coded according to the lead size. Fashion trumped function in this case, and I ordered the red translucent body (which just happened to be a 0.4 mm size). This pencil looks spectacular, worthy of prominent display in a pencil cup. There is a large grip section with fine knurling on it. It's not as grippy as the knurling on the Staedtler, but it is still effective.

Pilot Makes Good Pencils, Too
Like the Staedtler, the S10 has an obvious lead size marking on the eraser cap, as shown below. The cap also serves as the lead hardness indicator, which has selections for 2H, H, F, HB, B, and 2B. The pocket clip is sturdy and strong, and its brushed silver finish pairs well with the other accents on the S10.

Pilot S10
All three of these pencils work great. I don't use the Pentel P205 that much because I consider it to be more of a souvenir than an everyday writing instrument. The grip section of the Pilot S10 is noticeably thicker than the grip section of the Staedtler 925-35 (I don't own calipers; not that much of a dork).

S10, P205, 925-35
I do own a digital scale - the P205 weighs 9.2 grams, the S10 weighs 19.7 grams, and the 925-35 weighs 16.8 grams (all with several leads installed). I realize that the S10 may be too beefy for extended drafting or sketching sessions, but I typically only use it for short periods of time. If I had to choose only one of these to write with, it would be the Staedtler 925-35. If I had to pick one to look at, the Pilot S10 wins.

October 21, 2013

San Diego Padres Baseball Cap

I promised myself that I would publish this post before the 2013 baseball season ends. So read on . . .

I wrote about 59Fifty baseball caps a few months ago, and am still somewhat intrigued by the whole concept. Even though I'm not a huge baseball fan, I always like to root for the underdog. Accordingly, I recently acquired an official on-field cap bearing the logo of one of the suckiest teams in baseball: the San Diego Padres.


Technically, this piece of headwear should be called the New Era 59Fifty Official MLB On-Field Cap, San Diego Padres, Alternate Color (or something to that effect). The above picture shows the sticker flair that adorns the brand-new cap. I'm an old traditionalist, so I immediately removed all the stickers from the cap. I realize that some may consider this to be sacrilegious, but meh whatever. It's just a hat.


Yes, it's just a hat, but it's an OFFICIAL hat. It says so on the inner headband part. That makes it special, I guess. I like the fact that the hat isn't cluttered with New Era branding or other extraneous logos. It has the San Diego emblem on the front and the obligatory MLB "batter man" logo on the back - that logo has been around since the late 1960s (not kidding).


I like the olive color and overall look of this cap. Unfortunately, the crown doesn't fit my pin head as well as it should. I may need to hit the New Era online forums to see how best to shrink the crown a bit. LOL, there's an online forum for everything in the world these days. So awesome.

October 11, 2013

Lamy Safari/Vista Nibs

My opinion of my Lamy Vista seems to change from month to month. I was very happy with it when I first got it (read all about it right here), but I've moved on to different and better fountain pens. I bought the Vista with an extra fine nib, but I've grown to dislike it. It's scratchy, it skips quite a bit, and it's not very smooth. Fortunately, one great thing about the Lamy Vista (and Safari) is that the nibs are interchangeable, are rather inexpensive, and are available in several different varieties. For that reason alone, the Lamy is great for experimentation.

So, back to the nibs. I ditched the extra fine nib and replaced it with a fine nib. That worked slightly better, but it still performed poorly compared to most of my other fountain pens (I realize that it may not be fair to compare the Lamy to "better" pens like the Pelikan M205, the Pilot Custom Heritage 91, and the Sailor Professional Gear, but they do serve as valid reference instruments). After suffering with the fine nib for a while, I decided to try a medium nib - it was on sale and hard to resist.

Lamy Vista - Medium Nib
The medium nib writes noticeably wetter and smoother than the fine and extra fine nibs, which is nice. However, the medium still skips from time to time, especially on good paper like Rhodia. It just seems to be really finicky. The aforementioned "better" pens do not skip or stop writing like this at all, so I'm disappointed and ready to call it quits on the Lamy. Well, maybe not giving up on it or throwing it away, but I don't think I'll be buying any more nibs for it.

Lamy Steel Nibs (EF, F, M)
Here are some writing samples that I prepared using the Lamy Vista with the medium nib, on different paper types:

Lamy Medium Nib Sample 1
Lamy Medium Nib Sample 2
Lamy Medium Nib Sample 3
Sample 3 was written on Rhodia Dot Pad paper. This is where most of the skipping and stopping occurs. I guess the Lamy nib does not like to write on super smooth glass-like paper. I suppose I could make this a non-issue by only using the Lamy on "lesser" paper, but then I would have nothing to complain about. What fun is that?

I really wanted to compare all three Lamy nibs side by side, but I didn't want to try hot swapping the nibs with a converter full of ink. Instead, I decided to fabricate a dip pen using cutting edge technologies.

Dip Pen
I would like to say that this setup worked well, but it really sucked. It did, however, enable me to scribble some lines in a very unstable manner for purposes of a side-by-side comparison. The less than impressive results are shown below:


I don't even know if there is a point, take-away, or moral to this story. I guess the TL/DR version is: I've tried three steel nibs from Lamy, and have struck out. I prefer to use my other pens that don't like to hop, skip, and jump so much.

September 30, 2013

A Tattoo Tribute

I recently wrote about my absolutely bad ass skateboard deck, which was hand painted by Craig Driscoll. That post can be found here. Dealing with Craig got me thinking about a tribute tattoo in honor of my dad. I had the concept and design elements in mind for a long while, but never pulled the trigger or felt that the timing was right. Perhaps the skateboard artwork got me motivated or something, but whatever the case . . . I asked Craig to do the tattoo.

My dad was a draftsman: he worked by hand back in the day and then was forced by the powers that be to transition into CAD. I have very fond memories of going to work with Dad when I was a wee lad and he was still drafting the old school way, with mechanical pencils, triangles, a compass, templates, etc. It was always fun to play with his gigantic Bruning electric rotary eraser; I would draw random pencil marks just so that I could take the Bruning for a spin. That electric eraser became the central design element of my tattoo. I provided some reference photos and Craig started sketching.


I threw out some other "drafting" themed items for Craig to consider, such as mechanical pencils, triangles, a T-square, French curves, etc. Craig decided to keep it simple, so he merely incorporated a couple of French curves into the banner and background design. I also asked Craig to include an orange and/or some orange blossoms into the design; Dad was very proud of his two orange trees that produced the sweetest fruit year after year. He nurtured those trees for as long as I can remember, and they are still standing and bearing fruit to this day. So, yeah, I really wanted the design to include the orange stuff.


Watching Craig complete the sketch was a treat. I wish I could draw like that. Anyway, the completed sketch (shown in the above picture) was used to create the stencil, which in turn was applied to my lower leg. About 90 minutes later, the black line work was completed and we called it a day.


It's a little difficult to read and interpret the black outlines in the absence of any color and shading. If you look closely, there are two French curves lurking in the design, along with an orange slice at the bottom, and a few orange blossoms here and there. The above picture was taken after the tattoo had healed for about a month. The color and shading have since been completed, but the skin is far from healed at the moment. I'll publish another post to show off the finished product as soon as I can!

September 23, 2013

Green Tea From Japan: Acquired!

It's about 3:00 PM as I write this on a Monday afternoon. I usually drink one or two cups of coffee early in the morning, and Japanese green tea in the afternoon. I'm actually drinking a cup of sencha right now.

I recently received a nice little package from the Japanese tea company known as Hibiki-An. I bought a can of their matcha premium and a bag of their sencha fukamushi premium (shown below).


I've always liked Japanese tea, but never really paid too much attention to it. A few years ago, however, my attitude shifted in the following manner. First, I grew tired of the "fake" green tea bags that you find in variety packs of Tazo, Bigelow, Stash, and other brands of tea. This led me to check out the tea section in my local Japanese market. Wow, so many brands and types to choose from; I eventually decided to try some "real" green tea bags. I somewhat randomly decided to pick up a box of Den's Tea genmaicha tea bags.

Long story short, those tea bags were great. This led me to the Den's Tea website, which in turn introduced me to the deep dark world of Japanese green tea, the different types, the different tea-growing regions, how the tea is grown, harvested, and processed, blah blah blah. Moreover, I learned that it's important to brew Japanese green tea properly, i.e., with the right amount of tea, the appropriate volume of water (at the correct temperature), etc. Of course, this led to the acquisition of tea-brewing items . . .


I keep all of this gear (I prefer to call it "gear" or "equipment" rather than "teaware") in my office and at the ready for my afternoon green tea sessions. Going clockwise and starting at the 12:00 position: an awesome handmade tea cup by the Japanese artist Yamane Seigan; digital scale by Jennings; tea scoop; Tokoname kyusu (i.e., teapot); tea canister. Not shown are my electric water kettle (with digital temperature readout, thank you very much) and my digital timer device, which I don't really use anymore - I use the very cool online E.gg Timer instead. I freely acknowledge that in the real world most of this stuff is optional. That said, it's super important to control the water temperature and tea-to-water ratio, so I consider the scale and kettle to be key components here. I also consider the kyusu to be mandatory for the sake of tradition and to allow easy pouring and straining; it has a built-in ceramic strainer. I guess the canister is important, too. It's best to keep the tea in an airtight container to prevent oxidation. The teacup is totally optional, but it sure looks awesome.

Back to my recent haul . . . "fukamushi" means that the tea is steamed for a longer period of time, relative to standard sencha. This results in smaller pieces of tea, which in turn results in a different flavor profile (a little bolder and stronger, and usually less bitter than regular sencha). Here are two pictures for comparison. On the left is some standard sencha (from the Ippodo tea company). My new Hibiki-An Sencha Fukamushi Premium is on the right.


The differences in color, texture, and particle size are easy to see in these closeup pictures. I still have a little bit of the regular sencha in one of my airtight hermetically sealed canisters, but I'll be breaking out the fukamushi next.

September 12, 2013

Pen Display Case

Anyone remember that George Carlin skit about finding a place for your stuff? "That's the whole meaning of life, isn't it? Trying to find a place for your stuff." He was talking about houses in that skit. Never mind that; I'm talking about a place for my fountain pens.

I had been keeping my stuff (including a few pens) in my little valet tray. That worked well until my pen collection started to grow to the point where I needed a better storage solution. I didn't want to spend hundreds of dollars on a 250-pen case made of African Blackwood, and I didn't want to make a DIY case out of an old cigar box. So . . . I acquired an affordable and practical item: a 6-pen display case by Royce Leather.


The case is good for what it is. The fit and finish are a little suspect, but the black leather matches my valet tray and the viewing window is made of glass rather than plastic or plexiglass. The pullout drawer and the tray insert are a little flimsy, and the drawer is not supported very well. For example, it's very easy to pull the entire drawer out of its opening (there are no features designed to prevent that from happening). As another example, the drawer tilts downward when it's pulled out too far. That said, the case is very reasonably priced, and the workmanship and quality is on par for the price point. So there.

Royce Leather also makes a larger 12-pen display case; I intentionally obtained the small 6-pen size in a feeble attempt to limit my pen purchases. The following pictures show the case loaded with six writing instruments: Pilot 78G; Sailor Pro Gear; Pilot Custom Heritage 91; Lamy Vista; Baoer 388; and Pelikan M205.


Nit Pick Alert!

I've noticed that the pens tend to slip and slide within the tray slots whenever the drawer is pulled in or out. Oh well, that's inherent in the design and it cannot be helped. Maybe that's why many display cases have hinged lids. Another minor annoyance is that large diameter pens may not fit inside this case. For example, my son's Dragon Pen doesn't fit unless I carefully position it and consult my Expert Dexterity manual before attempting to slide the drawer in.

Do Not Enter
Don't let my nit picky criticisms influence your opinion of the Royce Leather display case too much. I like the case and feel that my money was well spent. I've found a good place for my stuff fountain pens.

September 2, 2013

New Phone = EDC Nightmare!

I consider myself to be a person who likes to keep up with new technology, gadgets, and electronic equipment. That said, I had been using an ancient Motorola flip phone for ages because it worked great, it held a charge for a week, and I rarely NEEDED anything other than basic voice service and basic text messaging. Don't misunderstand, I had always WANTED a modern smartphone, but I hated (and still hate) the pricing schemes that are forced down customers' throats.

Anyway, for a number of reasons I finally had to upgrade. I chose the Droid Mini by Motorola, and I'm happy with the decision even though I have nothing as a baseline for comparison. Here's a picture of the phone:

Droid Mini
Even though this phone is relatively compact (about the same size as the ubiquitous iPhone), it has created an issue for my usual EDC scheme. My typical EDC loadout includes: wallet; phone; keys; knife; flashlight; compact pen; and pocket notebook. I had a good, dependable, and well-thought pocket assignment back in the good old pre-smartphone days. Wallet in one back pocket, notebook in the other back pocket, keys in a front pocket or hanging from a belt loop, knife in the right front pocket (tip-up carry of course; tip-down is for losers), flashlight in the left front pocket, and the pen in the coin pocket (or wherever if I'm not wearing jeans). This worked well for me, regardless of the size of the knife (within reason) carried, regardless of the size of the flashlight (again, within reason) carried, and regardless of the particular pair of pants/shorts worn that day.

That leaves the phone. When life was simple and phones were tiny, I carried my phone in a belt holster. Dork accessory? Useful and convenient? Geek flair? Yes; all of the above. My belt-carried phone meant that it was always at the ready, quick to access and deploy, and easy to hear. Plus, I mastered the one-handed action of unholstering, flipping, and answering the phone. Seriously - ring to talk within milliseconds.

The Droid Mini is small, but nobody in their right mind would hang it from their belt. I don't use a man purse and I rarely use a briefcase or messenger bag. Consequently, I had to rethink my tried and true EDC scheme to accommodate my new phone.

Everyday Confusion
Take a look at the above picture. It doesn't look like much, but it is. The main issue is that I really want the phone to have its own pocket that will usually be void of keys, coins, and other objects that could damage or scratch the screen. Moreover, I don't like keeping it in my back pocket because I don't want to lose it or sit on it and break it. I could probably keep it in my left front pocket along with the pen or a small flashlight, but there's no way I'd be able to pocket both the phone and a larger flashlight or knife.

Now I'm thinking about ditching the pen and the notebook altogether. I don't use them that often, and the phone can be used in an emergency to dictate or write down important notes (e.g., "buy new flashlight" or "research blue-gray fountain pen ink"). That would definitely lighten and simplify my EDC load. I could streamline things down to the bare essentials: wallet + phone + keys + knife + light = no fun. As an alternative, I could stop carrying my "large" lights and knives and limit myself to AAA lights and blades that are less than 2.5 inches long. As an extreme measure, I could drop the flashlight from my EDC set and rely on an Android flashlight app instead. I don't think they have a Spyderco knife app, so I'll keep carrying mine, thank you very much.

You know, as of this writing I'm still within the 30-day return period of the Droid Mini. It's not too late to make a U-turn and re-holster my flip phone.

August 22, 2013

Fountain Pen! Sailor Professional Gear (Matte Black)

Several months ago I wrote a three-part saga that eventually led to the acquisition of the most buttery smooth, awesome-laden writing instrument in my collection: the Sailor Professional Gear (matte black body with silver trim; 21 karat gold, two-tone rhodium plated nib; medium size). The backstory can be found here: Part 1; Part 2; Part 3.

The backstory is nice, but what about the pen itself? First of all, the Japanese are really into the presentation aspects of their products. The pen arrived in a hermetically sealed plastic bag, which was secured within a hinged box (along with a couple of black ink cartridges, an ink converter, and unintelligible instructions written in Japanese).


Note that the hinged box shown in the picture was wrapped in tissue paper and surrounded by a nice cardboard box. It really made for a dramatic unboxing experience, and the tissue paper was effective at wiping away the tears of joy. Seriously; just look at the thing:


The silver colored trim really works with the flat black color of the body. It doesn't look too aristocratic, and it doesn't look cheesy or old-fashioned to my eyes. The thick silver band is inscribed with "Sailor Japan Founded 1911" (it's a subtle detail that is easy to miss). The clip and barrel rings are also silver colored. The body and cap are made of resin, and I like the matte black finish because it reminds me of a rat rod and it does a good job at hiding fingerprints. I'm very happy with my decision to get this finish rather than the standard "gloss" black.


The next picture shows Sailor's standard anchor logo atop the cap. The emblem is gold/brass colored, which goes against the silver trimmed theme of the pen. It's a minor aspect that doesn't really bother me (too much).


Sailor is well known for its nibs, and the reputation is deserving. The bi-colored nib is really nice to look at, and it writes as good as it looks. The gold highlights and design details on the nib are very impressive, too. The nib says "H-M" on it, and I assume that stands for "Hello Mate" or "Happy Monday" (LOL, some experts think it means "Hard Medium"). See for yourself here:


The build quality and fit and finish of this pen are top notch. It is not a very heavy pen (it weighs about 23.3 grams with the cap on and the ink cartridge almost full), yet it feels sturdy and solid in the hand. There is a thin o-ring seal between the body and the nib section to provide a stable seal after filling the converter or replacing the cartridge. There is also some type of compliant seal inside of the cap; I can feel something compressing when I twist the cap onto the body. I assume this keeps the nib from drying out.

The Pro Gear may be a little short for some people to use unposted. Although I usually post the cap, it's totally comfortable and easy to use unposted. Here's a nice picture of the pen uncapped, with absolutely no scale or object for use as a sizing reference. Sorry.


Writing with the Pro Gear is a treat. The nib is noticeably smoother than most if not all of my other fountain pens, the medium size is nearly perfect for me, it always starts right up, and it hasn't skipped or stopped writing on me yet. Maybe I got lucky, but this pen worked perfectly out of the box, and I wouldn't change anything about the nib.

I'll end this post with a writing sample on Rhodia paper. It was written using the black ink cartridge that came with the pen (Sailor's black ink is a nice, deep, and uniform black). I'm currently using the converter (by the way, the converter is pretty handsome too . . . the silver trim on the converter blends well with the silver accents on the pen) filled with Diamine Eclipse ink. The Diamine ink also performs very well with this pen.


I'm glad that my torturous pre-purchase routines and thought processes resulted in a stellar writing instrument and zero buyer's remorse. I can highly recommend this pen without any reservations. Go get one!